A Piece of Cake Designs A Piece of Cake Designs home FAQs view cart
Showing posts with label gelatos. Show all posts

Monday, 9 February 2015

Messy Monday with Natalie ...


 How was your weekend?
It's HOT here in Adelaide and we have a few more HOT days coming up too ....I'm not a fan of hot weather ... actually I hate it... but there could be worse things!

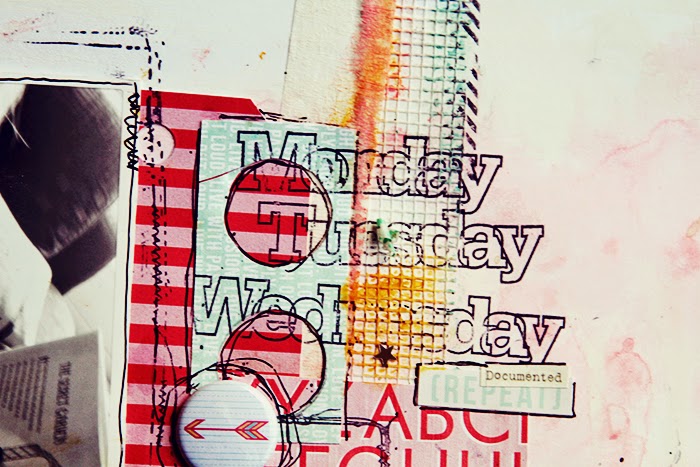
So today I'm sharing a page I created with the January Cupcake Kit!

I have forgotten how much I love working with Gelatos!
There are TWO double scoops in the kit - awesome!


For this page, I used them as watercolours by rubbing them onto my craft mat 
first then using a paint brush to apply them to my page.


I then stamped with them by making a puddle of colour on my mat
then stamping into it then straight onto my page. 
I love the way it creates a softer look.
So I hope you are all staying cool - where ever you are!

Have a great day

Natalie May


Tuesday, 3 February 2015

TUTORIAL TUESDAY - Guest Post, Jodie King


with


Hi friends, it's Jodie here today and I'm so excited to bring you my first post as Guest Designer for APOCD's January Releases! I've used the Cupcake Kit and a January release Cut File & Brushes from the Digital Store.


Our DS is about to start Uni, and this weekend he moved out of home so that he can study in Brisbane. I wanted to create a layout to celebrate this incredibly exciting time for him, a time when the whole world just seems to open up and anything is possible.


The January Cupcake Kit has two gorgeous Double Scoop Gelatos, and I've used the Mango Gelato in three ways to create my background. Here's a quick step by step on how I've created it.


Start with a piece of white cardstock and prime it with Gesso. Priming allows the Gelatos to blend more easily over the surface and gives a smoother finish, and it also prevents the cardstock from curling and distorting quite as much.

Allow the Gesso to air dry. When dry apply the Gelato across the page where you want the most vibrant colour to be. As you can see you don't need to be super neat with this step at all.


Take a baby wipe and rub over the Gelato to blend the colour, this creates a watercolour effect. When you have blended where you'd like the most vibrant colour, go over the edges with a clean section of baby wipe for a lighter shade, blending back to the white cardstock.


To use your Gelato to create a droplet or splatter effect, put a very small amount of water into a glass or small container. Rub the Gelato in circles on the bottom of the container to release the colour into the water. This may take a few minutes, but the more you rub the more concentrated the colour becomes.

When you have your desired colour, use a small paintbrush to apply splatters to areas of your background.


The final element to our Gelato background is to use a background stamp for subtle visual texture.

For this technique you will need a background stamp, a Gelato and a spray bottle of water (I've used a background stamp from my stash).

Apply the Gelato directly to the stamp in random sections (to create an imperfect edge). It's okay to get a fair bit of colour onto the stamp as it will be a darker layer over the already-coloured background. Spritz the stamp with water and let it sit for a minute while the Gelato activates, then stamp it on the already coloured section of the background. Repeat to create a random pattern.


And here's the background with our three Gelato techniques.


I've pulled a lot of the brighter papers and embellishments from the kit to match the vibrant Mango Gelato background. These pennant die cuts from the My Mind’s Eye Jubilee mixed bag come together as a quick and easy banner.


I've cut the word "Celebrate" in black cardstock from the Clink Clink Cut Files and Brushes. It doubles as my title and also as part of my journalling. I was curious if the scripty font would cut cleanly on my Cameo and I'm super happy with how it turned out - a beautiful clean cut.


There are lots of woodgrain elements in this kit, some of my faves being the Studio Calico Heyday frame stickers and the Jillibean Soup woodgrain frames.


To finish the layout I've added some black ink splatters using Mr Huey's (from my stash) and a few of the metallic sequins from the kit.

Thanks for dropping by today!

Jodie

Friday, 29 August 2014

Designer Inspiration - Gina Rodgers - Pretty Pastels..

Happy Friday everyone!.. I've been playing with the totally gorgeous and new main cake kit this week and I'm here to share the first layout... I've gone with a  pastel theme on this one, which combines well with a kraft background, especially when you through a bit of white in the mix.., 

So to start with, I scraped some gesso smears on the card and lightly coloured with a mix of gelatos and water soluble crayons in teal, pink and apricot shades..


I've tucked a few die cut's here and there..they are perfect for layering and there's HEAPS in the pack!

to finish I've embellished with cork and word stickers, sequins, flair and some machine stitching for added texture..


Thanks for stopping by and have a great weekend!
Gina x

Monday, 28 July 2014

Designer Inspiration - Lisa Pate

Hello Everyone !!

Can I just say how glad I am to be back in this space?? anyone who has ever had to move house will understand how time consuming and tiring it is.  And lets not forget the nightmare of trying to make sure you have a working internet connection.  We are still working on that!!

So I have had the lovely June Kit for a few weeks now, I had created some backgrounds and was waiting for some time and the right photo's.... fast forward to this weekend while we were re-stacking boxes in the new garage only to discover that three boxes which had housed my oldest scrapbooks for 6 months were WET ... and MOLDY and not at all salvageable.  It was a pretty sad moment I tell you.

I pulled all those pages out, and popped them into a crate and one by one I am cutting the photo's that can be saved off the wet and ruined layout and starting again.  Yes it's a huge job, but it's kind of fun making new layouts from old ones.

So onto the layout!!! I've done my usual messy collage style, but for the background used the gorgeous Lindy's Stamp Gang Spray that was provided in the kit (plus another I already had in my stash).  These sprays are all kind of lovely to work with ... and the are PERMANENT !!  yep, that's right they do not run together and turn brown.  Plus they layer so well over dark coloured cardstock.

 So much fun.


I hope you never ever have to find your scrapbooks ruined like I did.  So please if you do have your scrapbooks stored out of sight, check them :)

Lisa

Thursday, 17 July 2014

She loves to read and tell a story too:)


Hi again everyone,
I am back to share another layout using the June Cupcake kit.


This layout is a photo of my daughter who LOVES
to read!! She is also a great, animated story teller and I really
wanted to document this aspect of her life. 
Often when we go shopping and if she has some pocket money , more 
often than not she goes straight for the book sections
in the stores.


I have like the last layout,
used a tag from the kit to highlight and frame my 
Instagram photo.
I have used lots of different strips of the papers,
as well as the sticker sheet in the kit.
I have added some of my own washi tapes and a past kit flair.


I LOVE this mask so I used a yellow Faber Castell
gelato to add these words to my page. 


Thanks for stopping by. I hope you are enjoying your kit , Eb x

 
A Piece of Cake Designs Blog, All Rights Reserved
Blog Theme by Mod Melon Creative